
Our self-serve campaign wizard allows you to create and request campaigns on a self-serve basis with PIM integrated Media Owners. PIM integration refers to a Media Owner's product integration management system.
In this article:
Begin your self-serve campaign creation
Product Selection
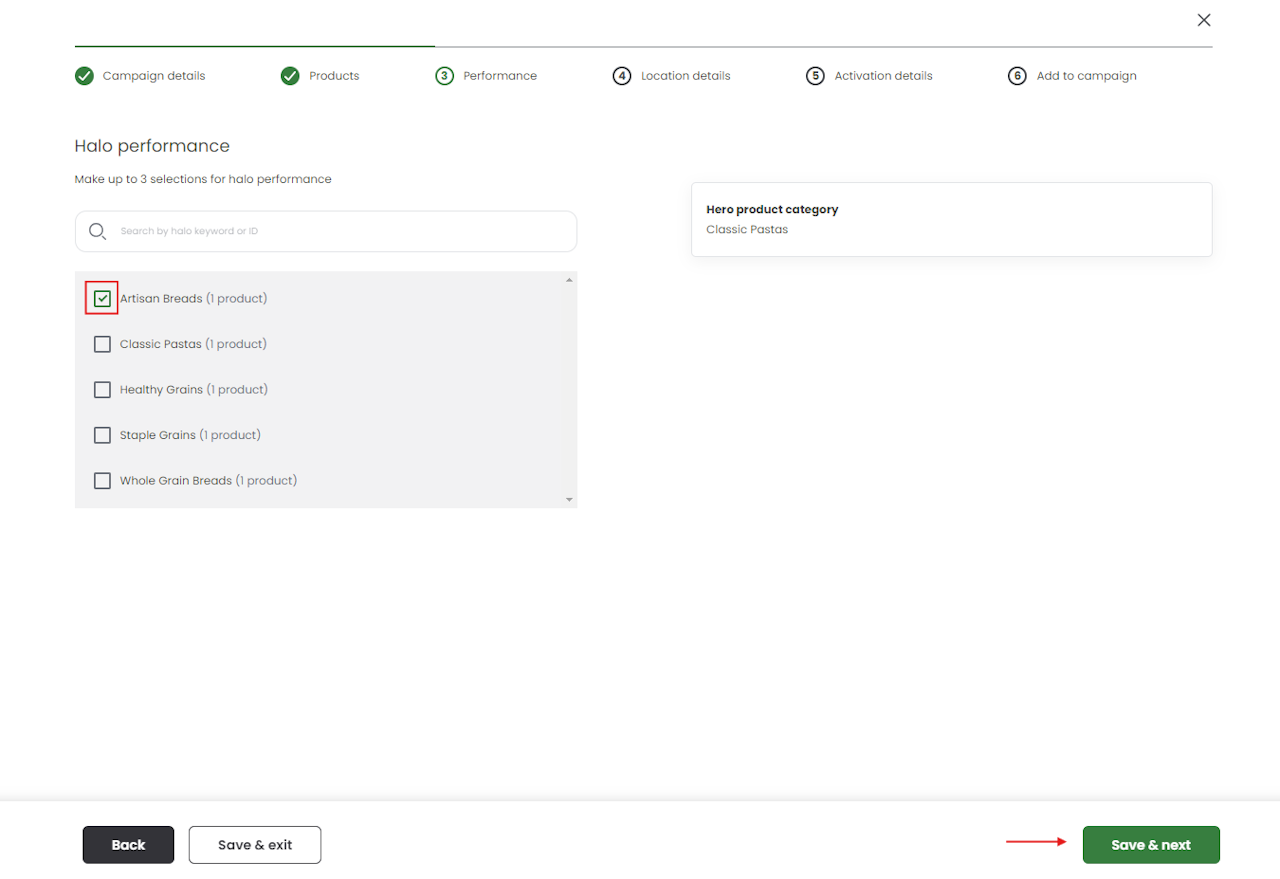
Halo Performance Selection
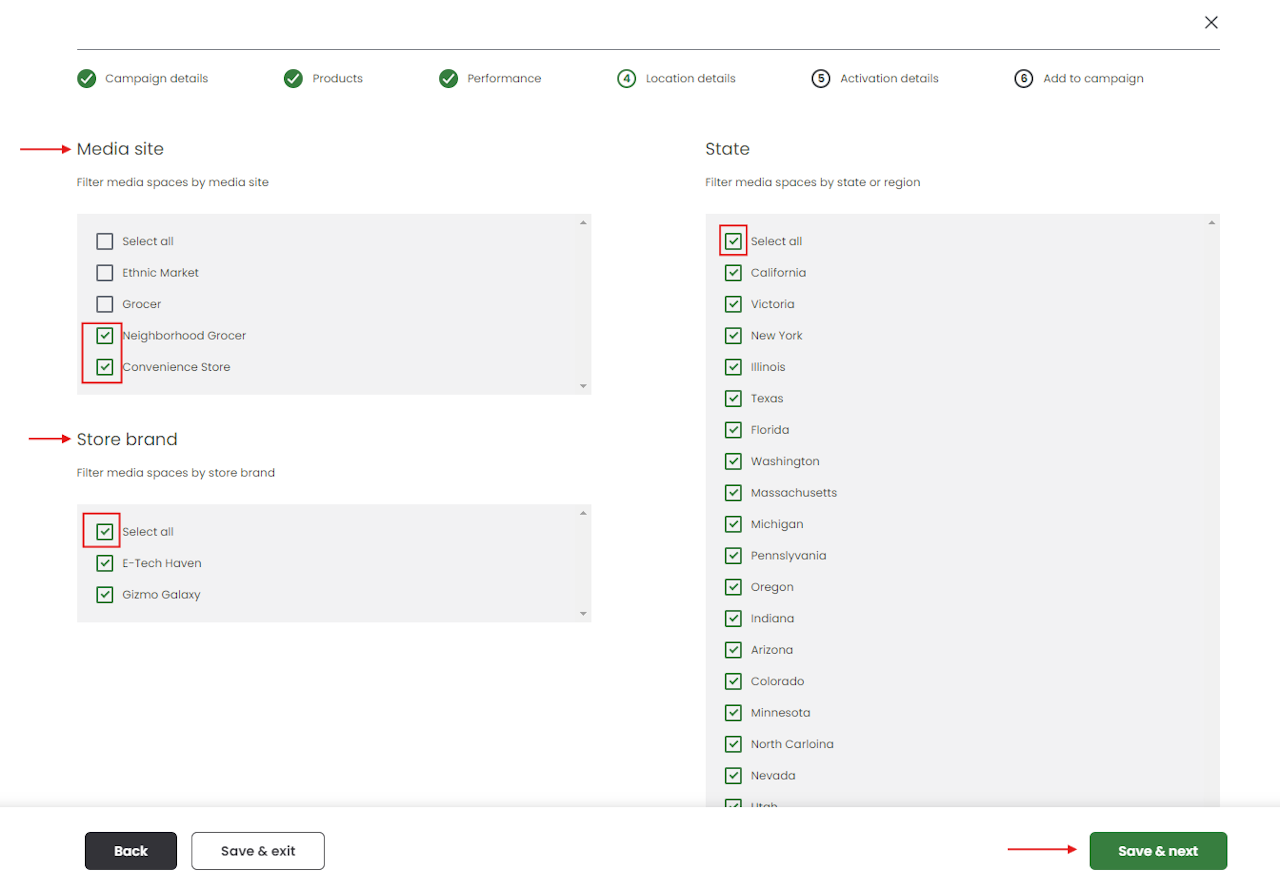
Media Site Selection
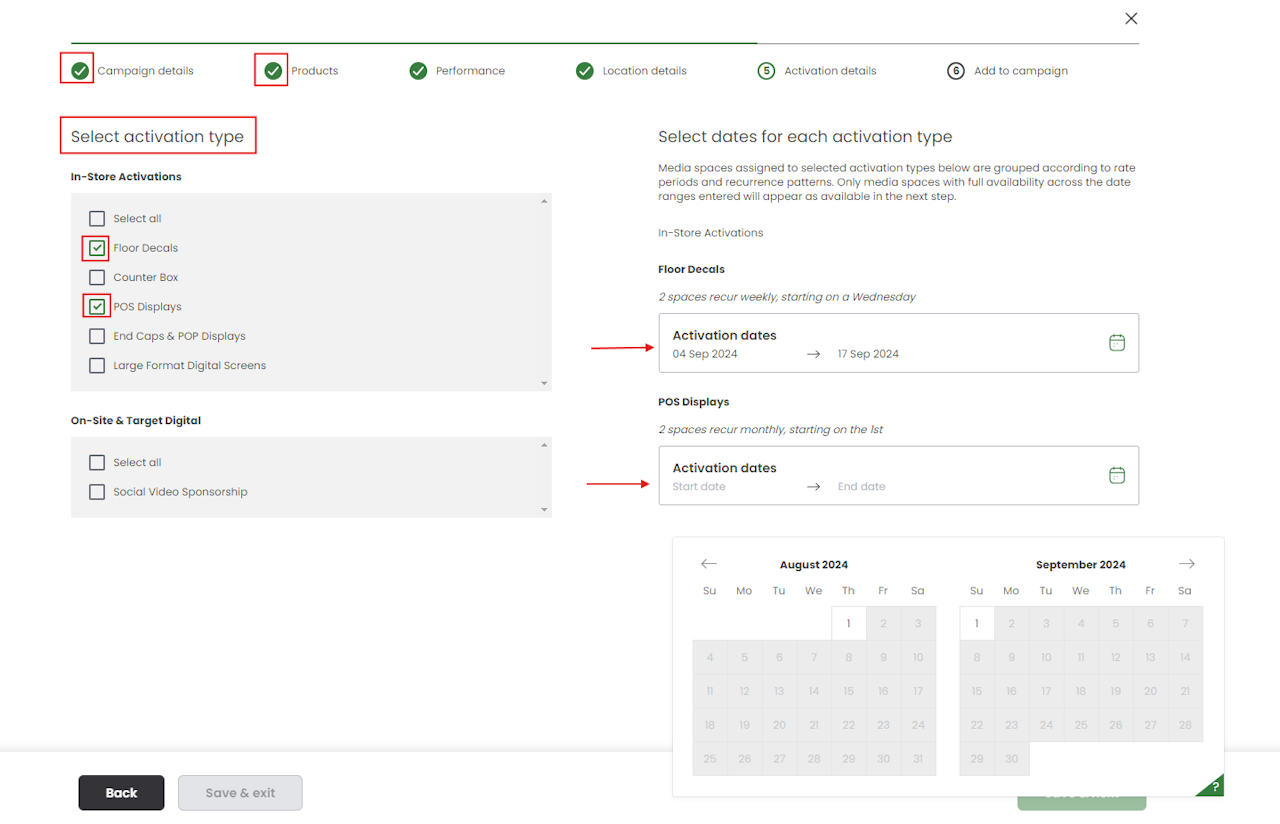
Activation Type Selection
Media Space Selection Filtering Options
Add Media Spaces to your Campaign
Campaign Summary Page
Sending your Campaign Request
Here's how to build your own campaign using our self-serve wizard:
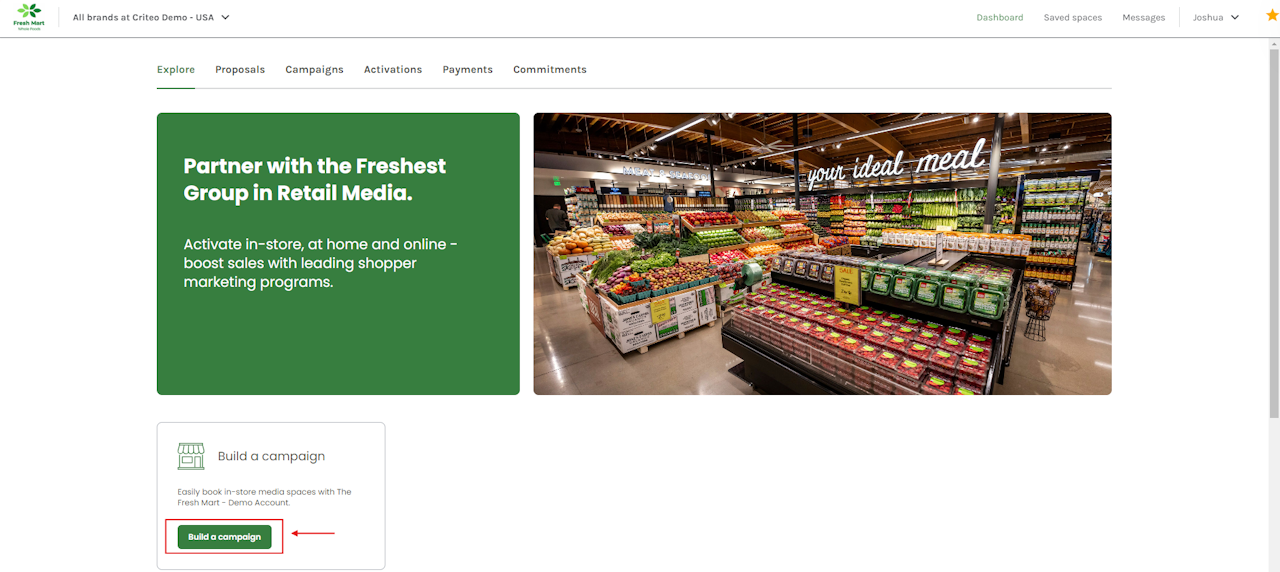
Click on Build a campaign from the Media Owner's Explore page.

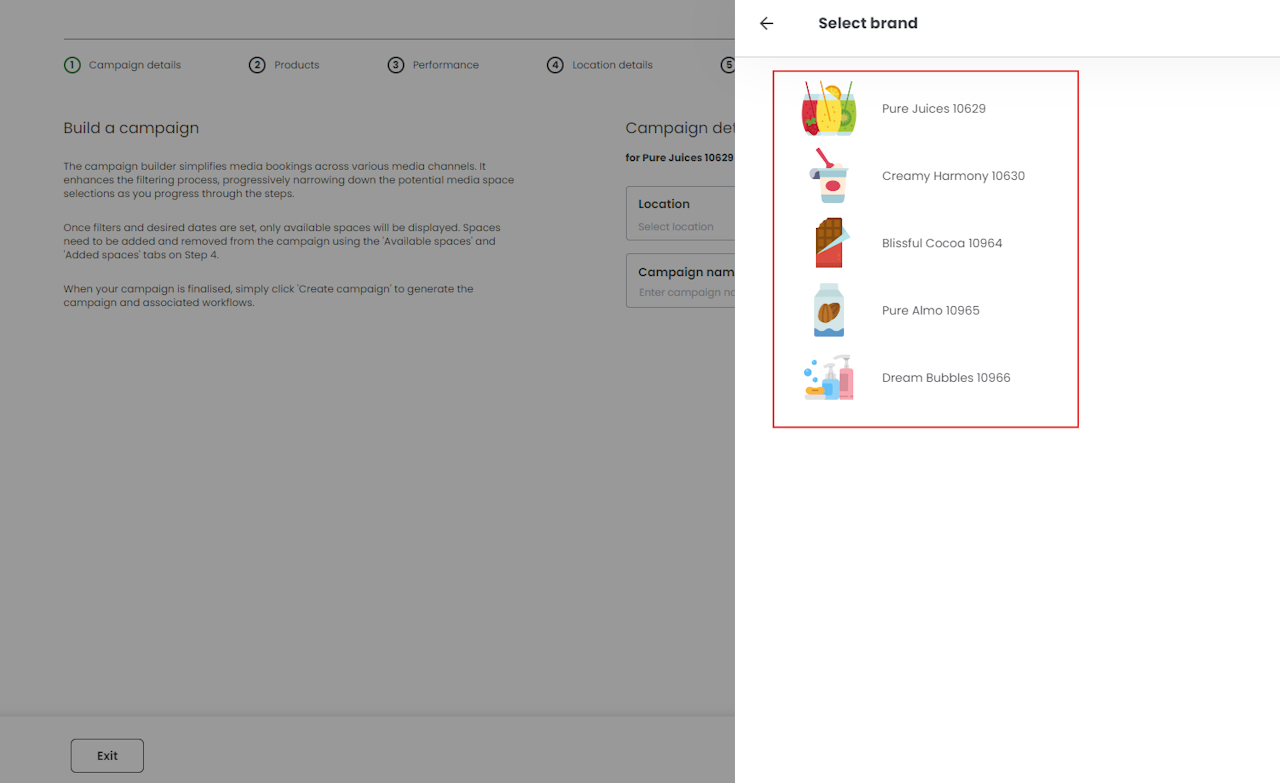
- Select the brand that you'd like to create this draft campaign for.

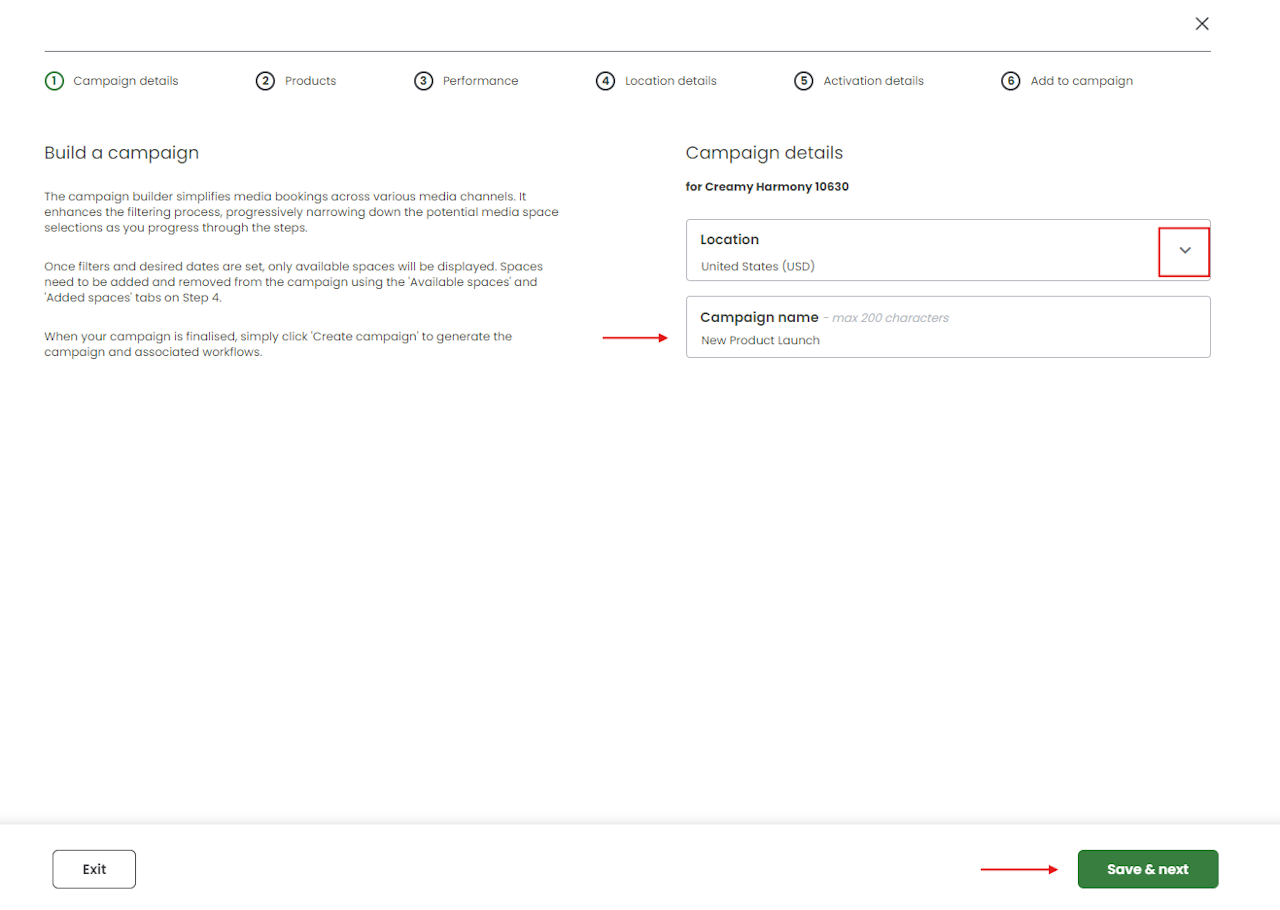
- Once you've selected your brand, click on the Location dropdown menu to select the location as to where you would like to activate.
- Enter the name of the campaign under the Campaign name field. A maximum of 200 characters can be inputted here.
- Click on Save & next to proceed.

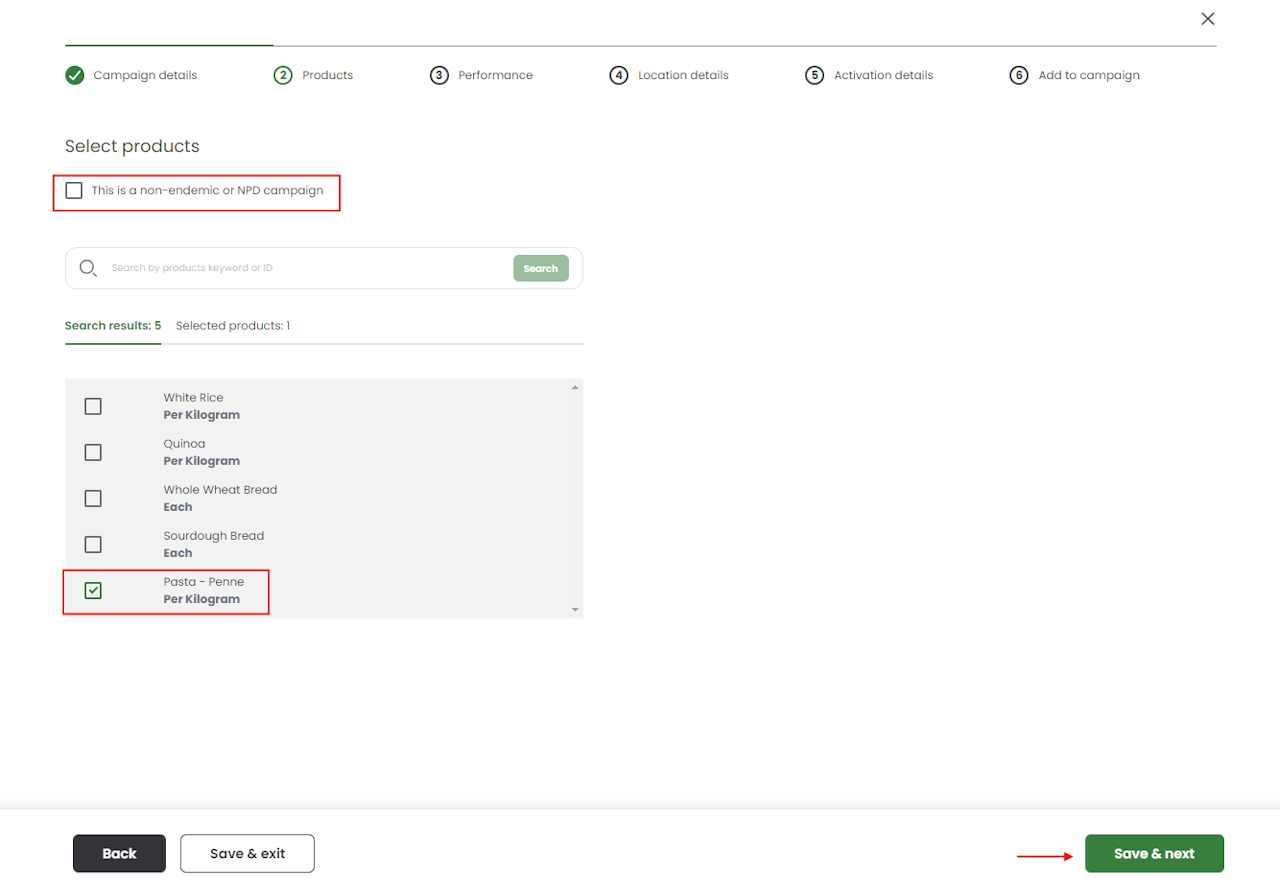
- Select the desired product that you'd like to promote in this campaign from the available Search results. These results are based on what products you currently have integrated with this Media Owner.
- Alternatively, you can select the This is a non-endemic or NPD campaign checkbox if the product that you'd like to promote is not available on the shown Search results, OR if this is will be the first time that you will be activating with this Media Owner.
- Click Save & next to proceed.


- Select the Media site that you'd like to choose your Media spaces from. These Media sites are often categories or stores that have been set up by the Media Owner.
- Next, select the Store brand of the Media Owner.
- You can then filter the Media space options by state or region, based on your Media site and Store brand selections. Select some, or all of these by checking the Select all checkbox - depending on your requirements for this campaign.
- Click on Save & next to proceed.

- Select the Activation types that you'd like to utilize from what the Media Owner has available.
- When you've selected your Activation types, you'll then be required to select the desired dates that you'd like for each of these to go live.
- If there are dates that are greyed out, this means that these don't fall within the Media Owner's booking parameters. The example shown below, indicates that the POS Displays are only bookable on a monthly basis. If this doesn't align with your requirements, you can simply untick this checkbox and reselect a new Activation type if needed.
- You can go back to previous steps in the self-serve wizard by clicking Back, OR clicking on the green tick icons on the top of the page if you'd like to change any details from previous steps.
- Click Save & next to proceed.

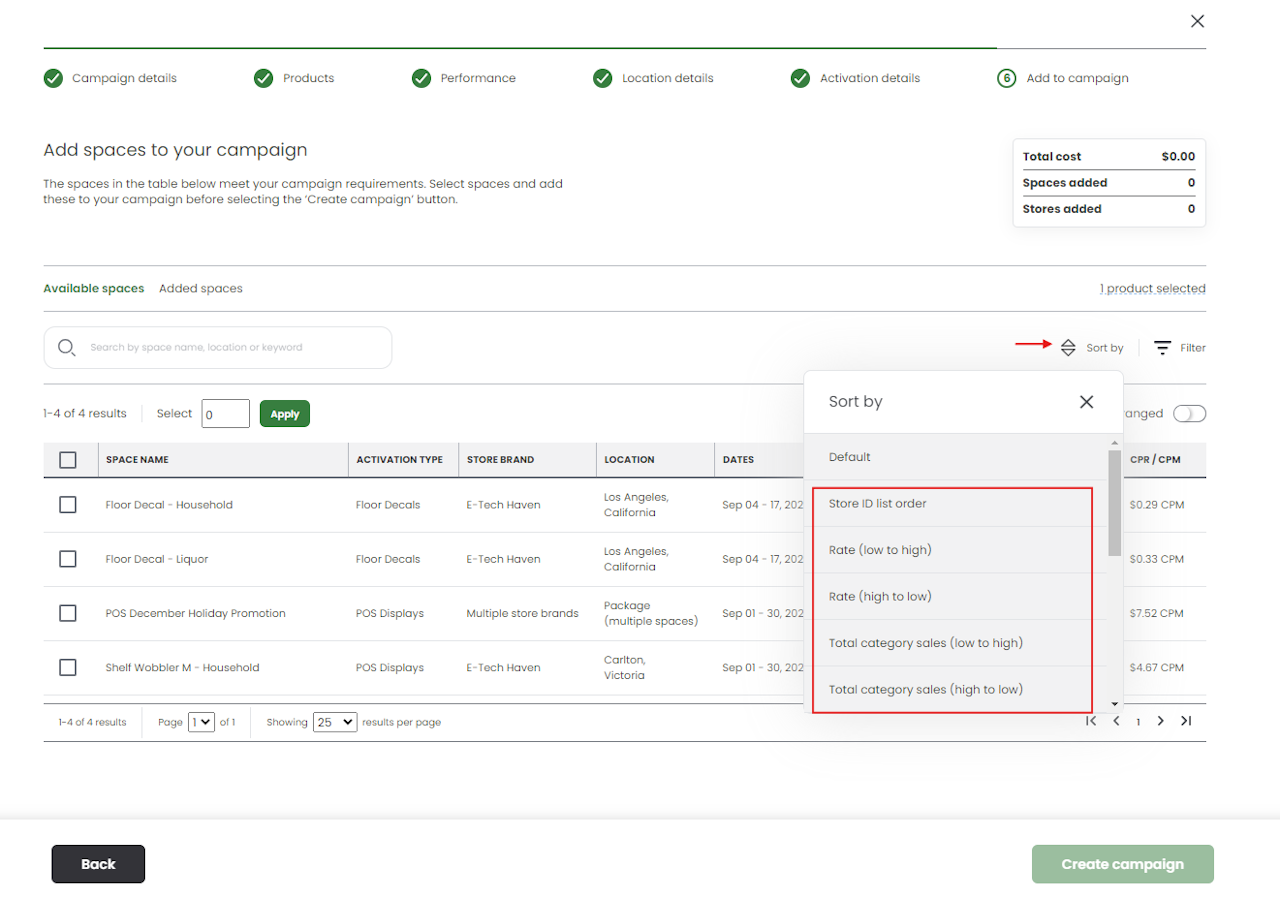
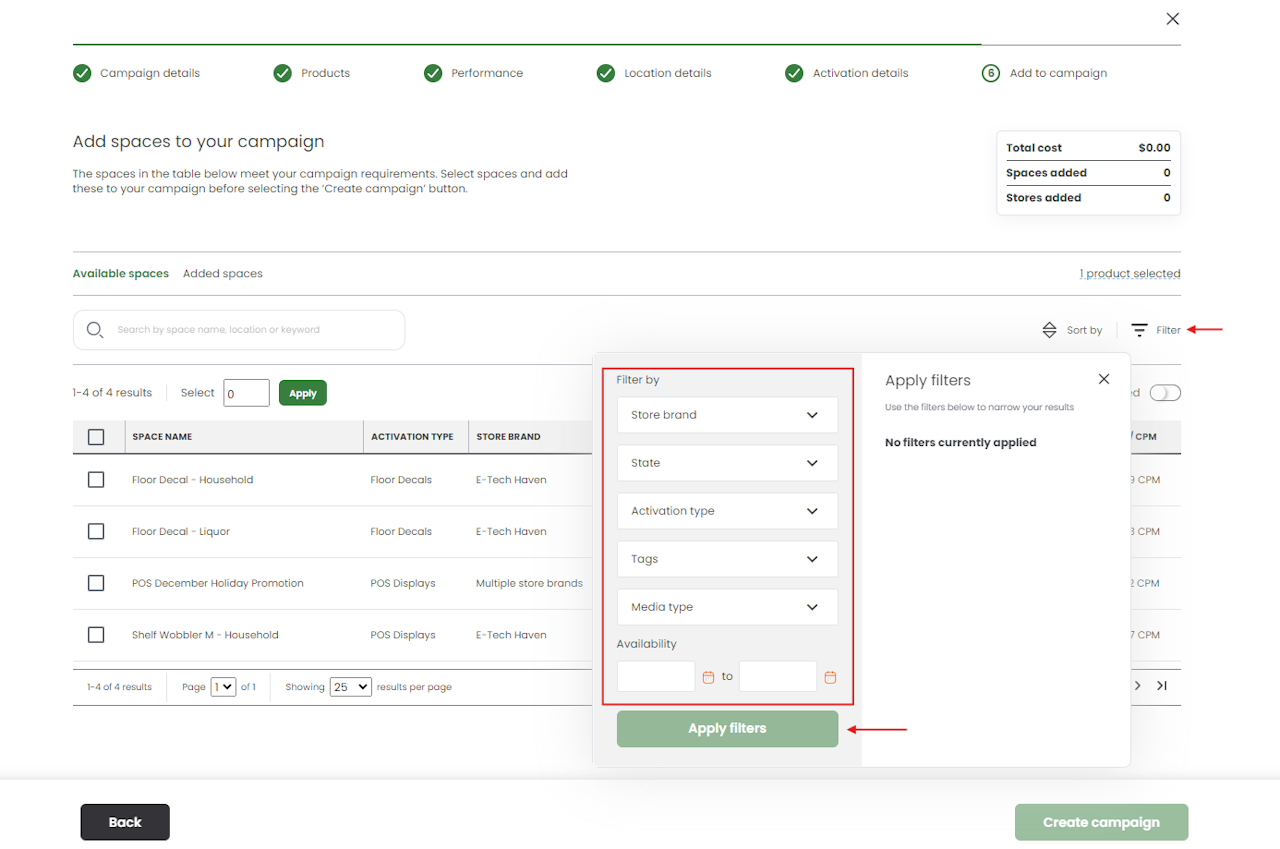
- You'll now be able to view the Available spaces, which are based on what you've selected on previous steps of the self-serve wizard.
- You can use the Sort by filter to sort the results by Store ID list order, Rates, or Total category sales.
- Rate refers to sorting by the cost of each space listing from least to most & vice versa
- Total category sales refers to the percentage of sales of the product against the larger category selection.

- You can also click on the Filter icon to filter by the Store brand, State, Activation type, Tags, Media type and Availability.
- When you've selected your filtering options, click on Apply filters - this will filter out your media space selections based on what you've selected. This is particularly useful when a larger amount of media spaces are available to select.

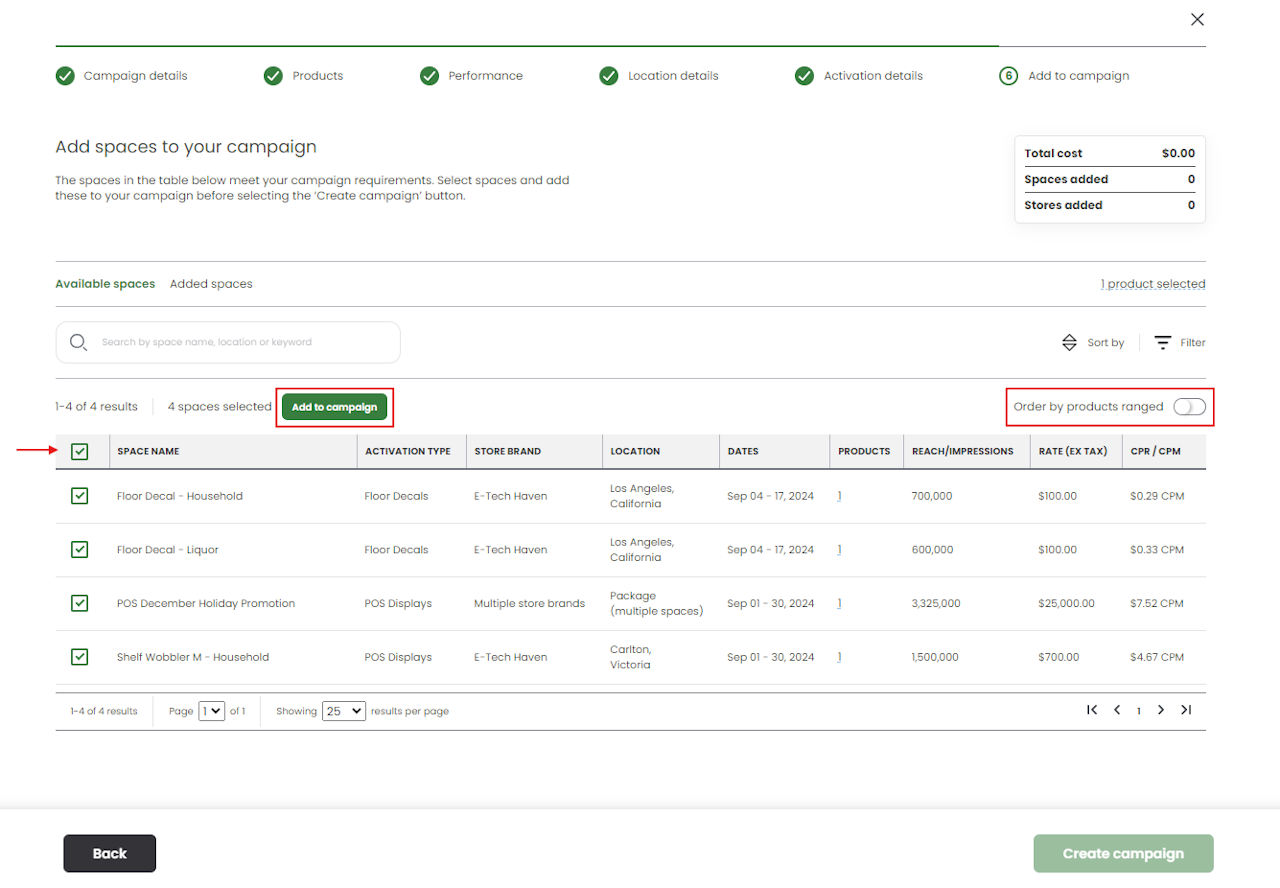
- You can toggle by the Order by products ranged, to view the most stocked products for each media space from most to least.
- Tick the checkbox next to each media space that you'd like to add to your campaign, OR tick the checkbox in the first row to select all options.
- Click Add to campaign once you've made your selections.

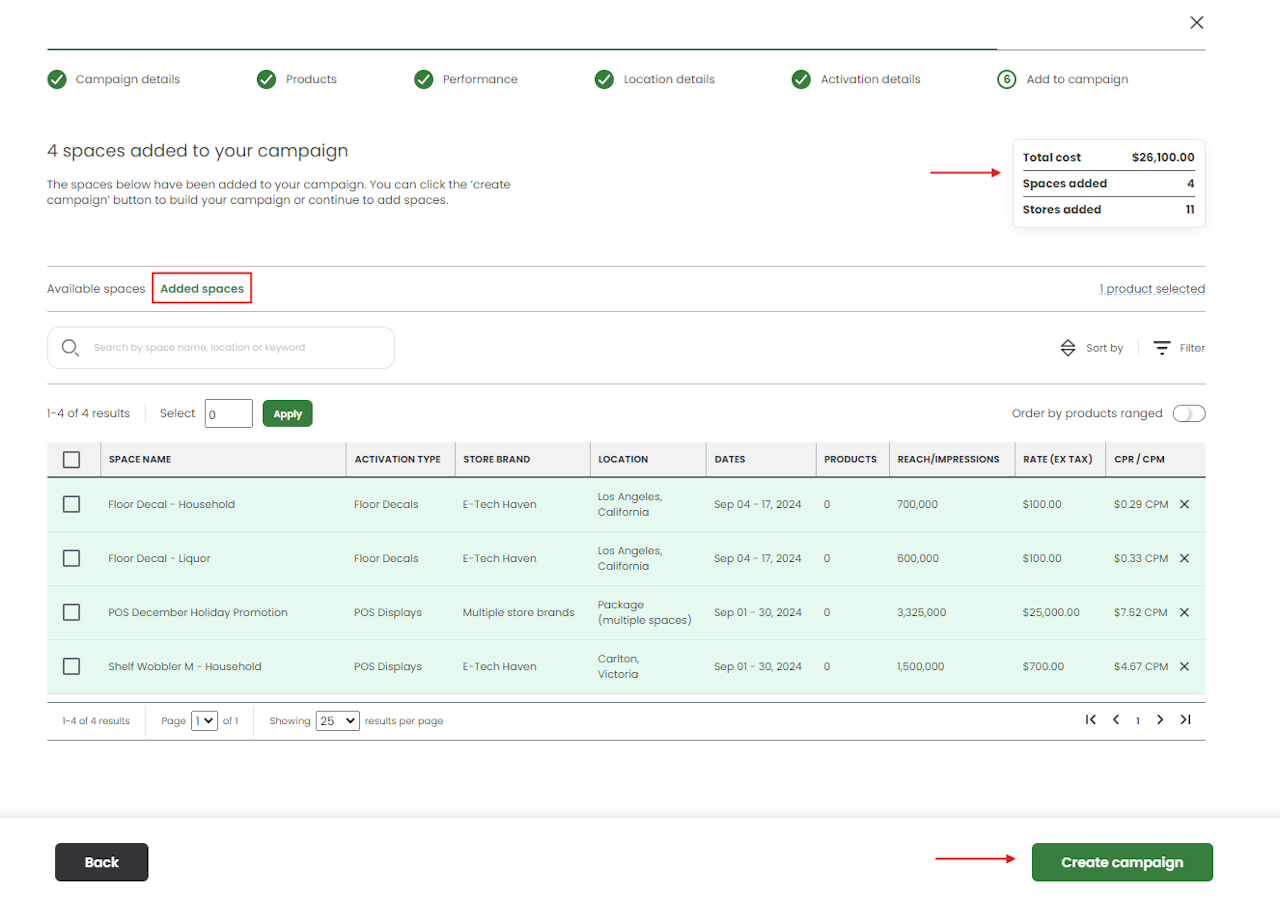
- The media spaces that you've added will then disappear from the Available spaces tab and will move to the Added spaces section where you can review and remove any spaces if needed.
- The Total cost, Spaces added and Stores added will calculate as you add and remove spaces from your campaign, which can be seen on the top right of your screen.
- Click Create campaign when you're ready.


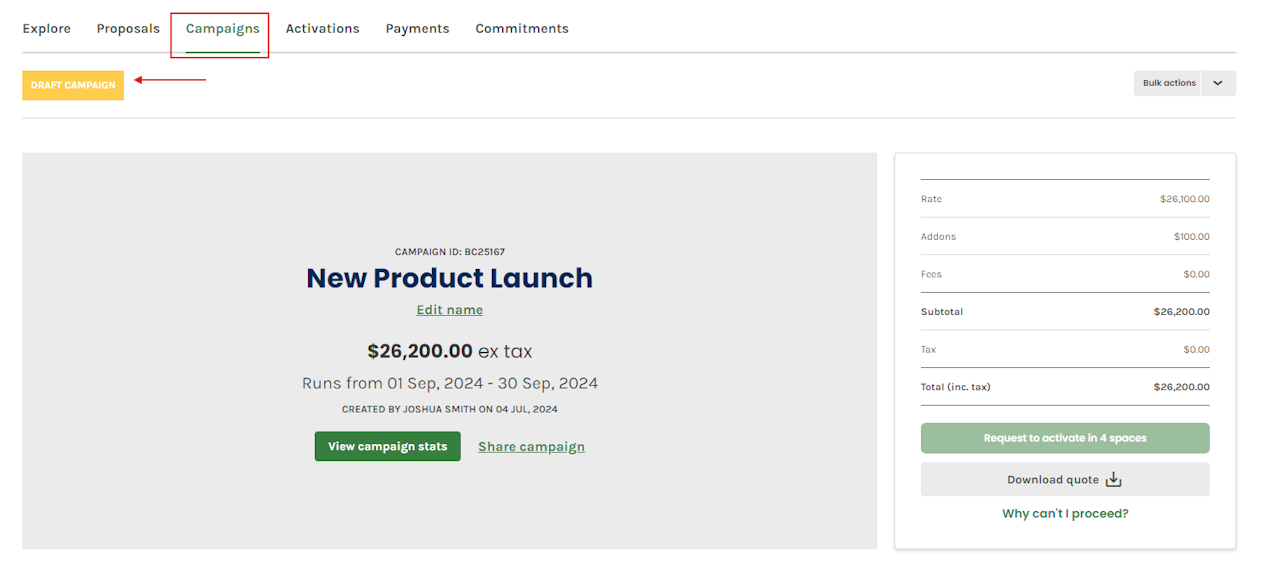
- Scroll to the bottom of the page to view the media spaces that you've added to your campaign.
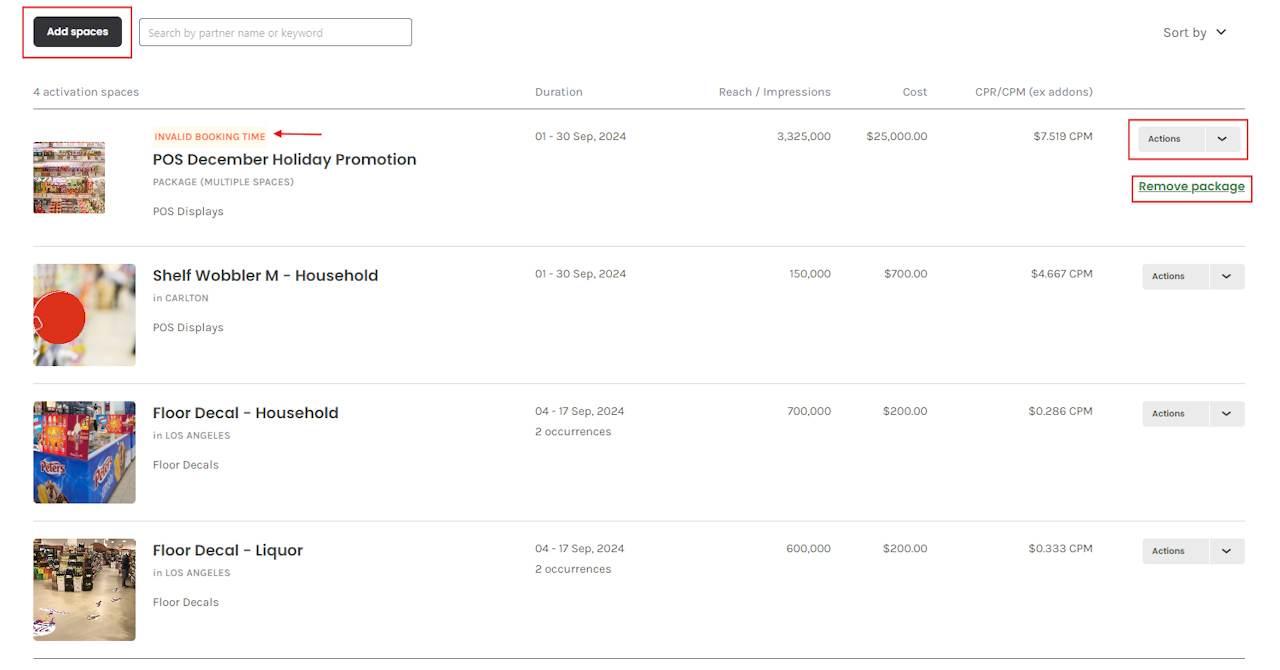
- An Invalid Booking Time alert will appear for a space if this is unavailable to be booked on the dates that you have selected.
- You can either hover over this and click on Remove, or click on the Actions dropdown menu to Edit dates or Message partner.
- You also have the option to add more media spaces to your campaign by clicking on the Add spaces button.

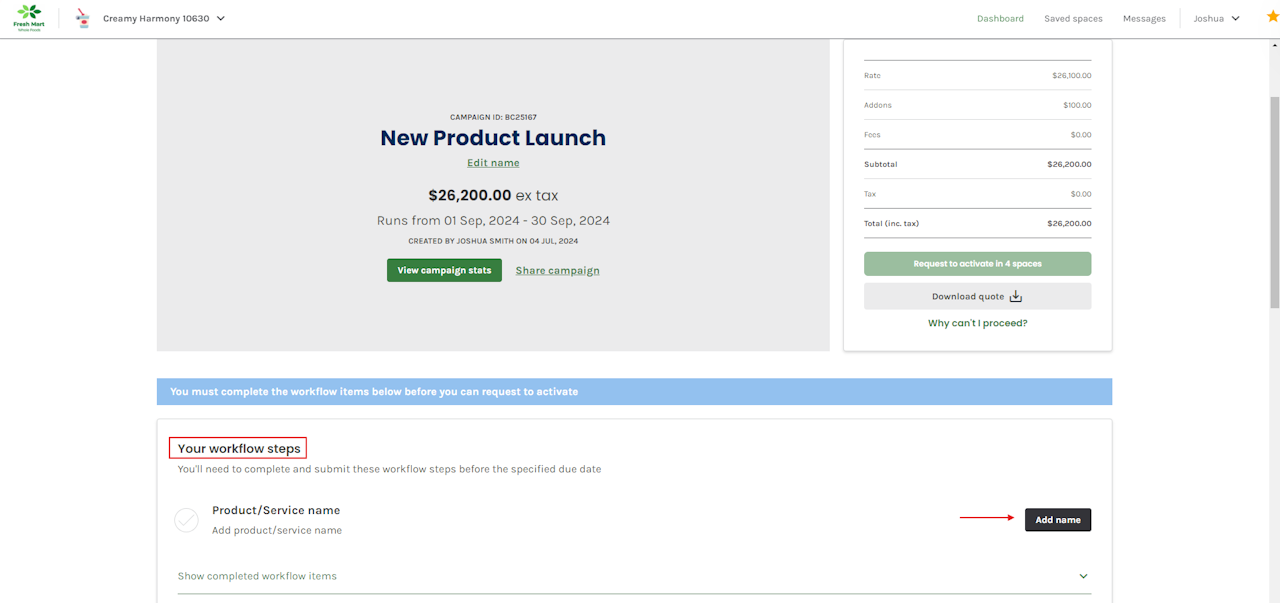
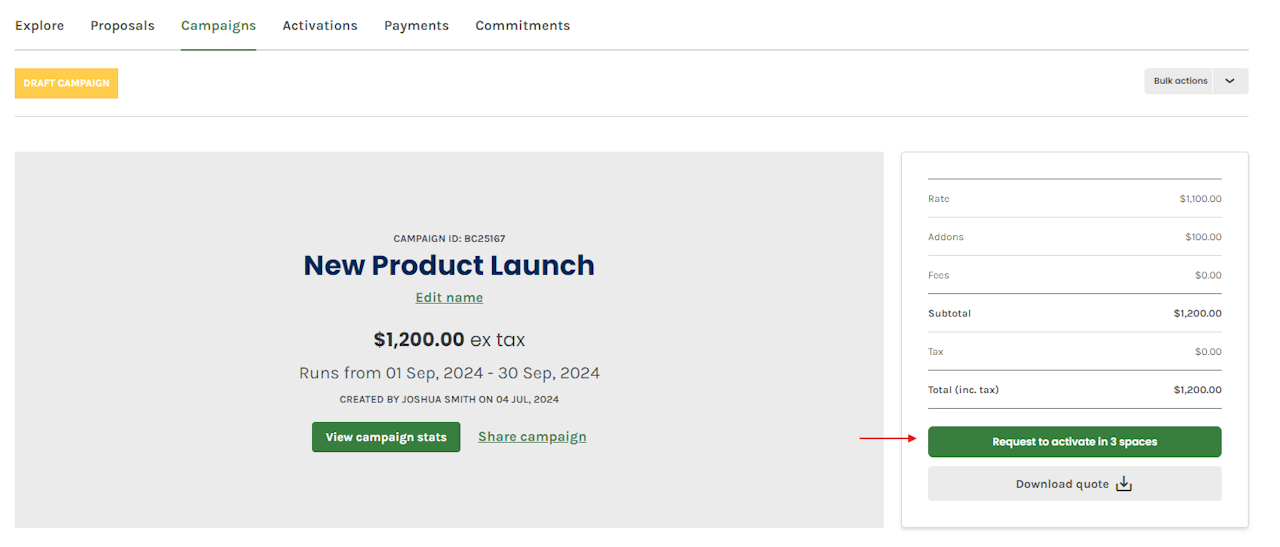
- You may see that the Request to activate in x spaces button is greyed out under the price summary table.
- This is because some Media Owners request workflow steps to be completed before submitting your campaign request. Complete these by scrolling to the Your workflow steps section to complete the requirements.
- For more information on completing Workflow items, check out this step-by-step guide.


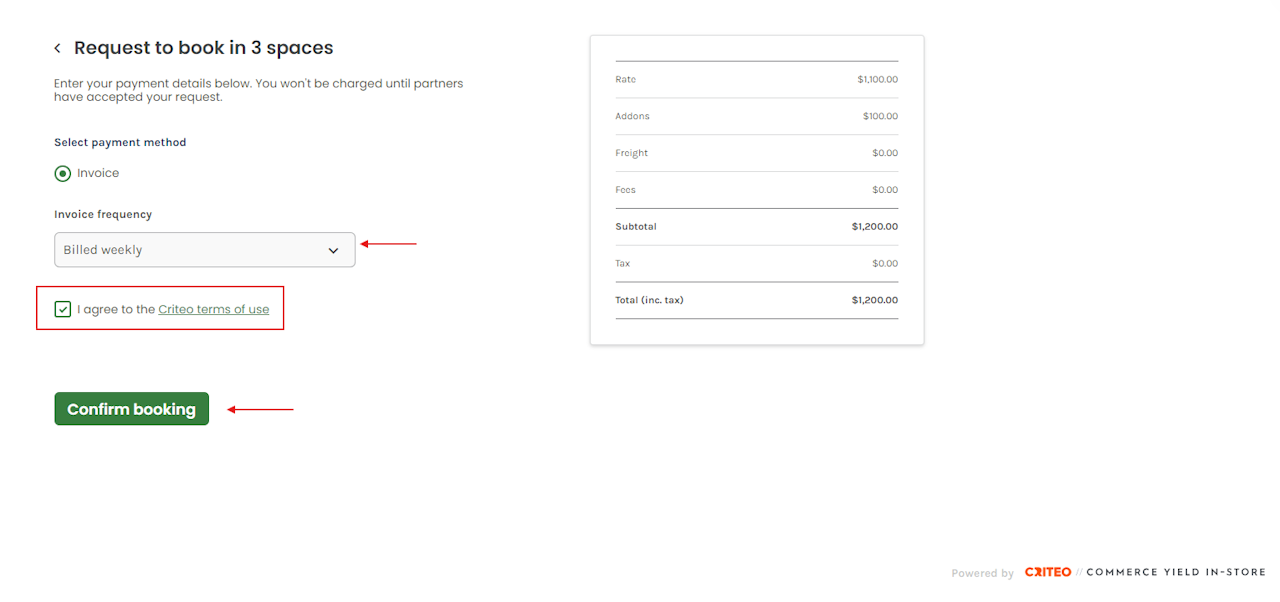
- You'll then be redirected to the checkout screen, where you can select your Invoice frequency by clicking on the corresponding dropdown menu. You can select Billed weekly, Billed monthly, or Billed in full - depending on the Media Owner's configuration settings.
- Tick the terms of use checkbox.
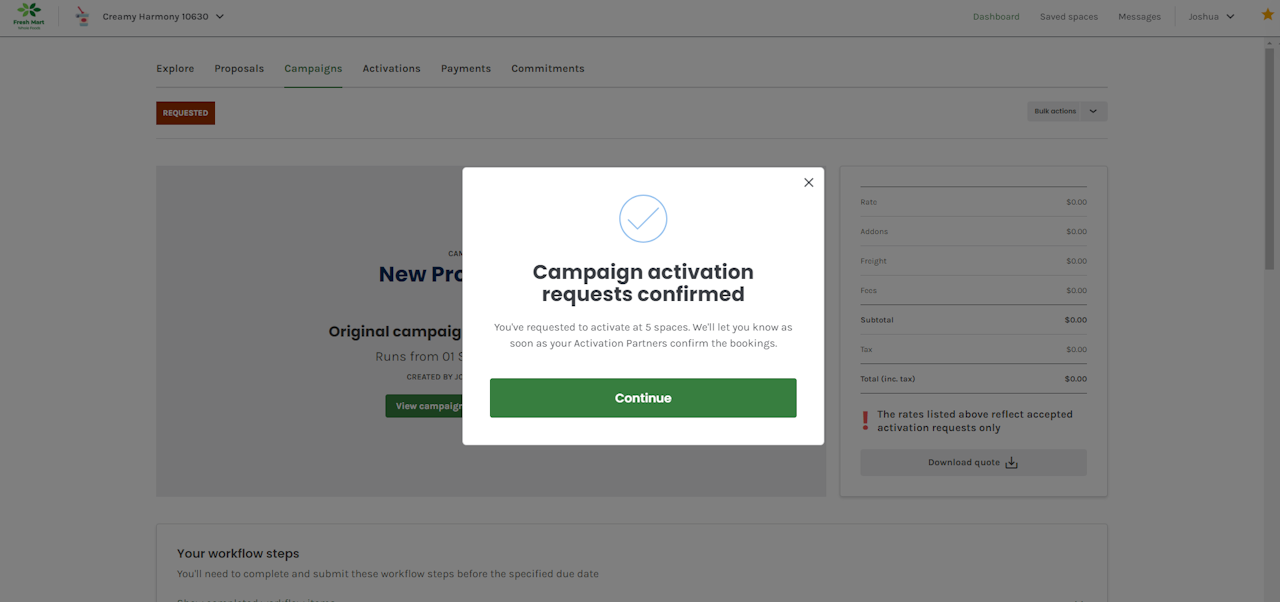
- Click on Confirm booking to send your campaign request to the Media Owner.

- The campaign status will change from Draft to Requested, until the Media Owner accepts or declines.
- The Media Owner has been notified of this campaign request and when accepted, the status will then update from Requested to Campaign in Progress.
If you're still having trouble with this, please reach out to your customer service rep or contact instore.support.apac@criteo.com, and a member of our team will be in touch.
